Hens And Chicks Clay Pots: Drainage, Watering, And Soil Tips
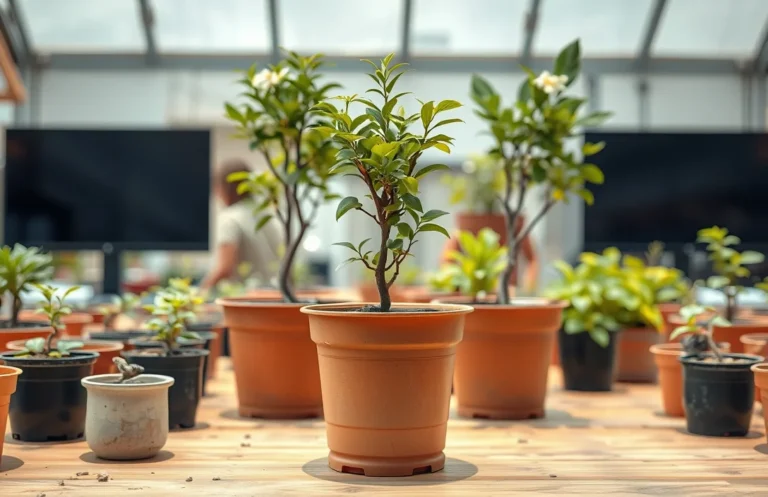
Hens and chicks in clay pots pair well because the plant prefers fast-drying soil, and clay dries quickly. The trade-off is you have to manage watering and drainage more carefully than you would with plastic. Pick the right pot size, set up drainage, use the right mix, and you’ll avoid the common problems instead of guessing.
Hens and chicks in clay pots usually do best when you water only after the soil is fully dry, using a gritty mix in a pot with drainage holes. In hot weather that can mean every few days, but in cool seasons it can stretch to every 1-2 weeks. If water sits or the mix stays damp, rot can move in quickly.
Key Takeaways
- Clay dries fast. Expect more frequent watering than plastic, but with less risk of stagnant moisture.
- Drainage is non-negotiable. Use a pot with drainage holes and never let runoff pool underneath.
- Soil must be gritty. Use a cactus/succulent base plus extra pumice or perlite so roots get air.
- Water on “dry cycles.” Soak thoroughly, then wait until the entire pot is dry before watering again.
- Sun controls growth. Give bright sun to partial shade, and cut back watering as light drops.
- Rot is the main enemy. Any mushy base or soft leaves means you need to act fast and improve drainage.
Hens and Chicks Clay Pots: Benefits and Limitations
Clay pots help hens and chicks because clay pulls moisture out of the soil faster than most other containers. These succulents store water in their leaves and stems, so they handle drought well. What they don’t tolerate is constant dampness. Clay also reduces the “wet feet” problem that drives rot.
Clay’s limitation is exactly that it dries quickly. Outdoors, wind and full sun can dry the mix so fast that you end up swinging between “too wet” and “too dry” if you water by schedule. They can handle the swings better than many ornamentals, but rot still starts when the mix stays wet too long.
My rule of thumb: clay pots are the better choice when you want lower rot risk and you’re willing to check moisture. If you travel a lot, have limited time, or consistently miss dryness checks, a glazed ceramic pot or a plastic nursery pot inside a planter is often safer because it holds moisture slightly longer – while still requiring drainage.
What Size Clay Pot Fits a Hens and Chicks Arrangement
Hens and chicks do best in a container only slightly larger than the root mass. These plants stay compact and spread by offsets, so oversized pots leave extra soil that takes longer to dry – and that’s where rot risk rises.
Start with spacing, then choose a pot that lets each clump spread into space rather than spreading into a big, wet soil volume. Many growers plan around 3 to 4 inches (or 7 to 10 cm) between clumps for early offset growth, then let the “daughter” rosettes fill in over time.
Use this sizing rule:
- Small starter pot (1 to 3 clumps): choose the smallest pot that still leaves 1 to 2 inches of space around the plants.
- Medium arrangement (4 to 6 clumps): pick a pot that gives offsets room to expand without requiring a deeper soil volume.
- Large centerpiece pot (7+ clumps): keep depth shallow and soil fast-draining, because more soil means more time to dry between waterings.
For a clean look, remember that depth matters less than dryness and airflow. A shallow clay pot – or a wide bowl with drainage holes – can work especially well because it limits how much wet soil can sit under the rosettes.
How to Drain and Prevent Root Rot in Clay Pots
Good drainage separates healthy plants from mushy crowns. Begin with a clay pot that has at least one drainage hole, then treat drainage as part of the planting setup – not something you hope will “work out.”
Two rot triggers show up in clay pots:
- Soil that holds water too long (too much peat/compost, not enough grit).
- Water pooling under the pot (a saucer that fills by accident, or a planter inside another planter with no airflow).
When you plant, elevate the pot slightly so runoff can escape freely. If you use a decorative planter (a shell around the clay pot), keep the inner clay pot free so water can drain out without collecting at the base.
Do this for reliable drainage:
- Use a fast-draining succulent mix (see mix section below) and don’t bury the rosettes.
- Break up dense clumps in the mix so water can move and air can circulate.
- Water thoroughly, then stop. Let excess drain completely.
- Empty any saucer after watering so the pot dries fast.
Skip the “mesh in the hole” habit. With the right mix, water should move through freely. Heavy liners or plugged media can slow drainage. If your local soil compacts tightly and you’re worried about clogging, place a small piece of screen over the hole only if it doesn’t reduce flow.
Watch for early rot signs:
- Soft, translucent leaves
- A base that turns dark and mushy
- A rosette that pulls away from the crown
If rot starts, improve conditions immediately and remove affected rosettes so healthy offsets don’t get dragged down.

Helpful pick
Orceler 6 inch Terracotta & Clay Pots for Plants with Saucer, Medium Terra Cotta Plant Pots with Drainage Hole, Flowerpot with Tray, Terracotta Pot for Indoor Outdoor Plant – Pack of 4 Planters
These 6-inch terracotta pots with drainage holes prevent waterlogged roots and simplify setup with a matching tray.
How Often Should You Water Hens and Chicks in Pots
Hens and chicks in clay pots don’t want weekly watering. They want watering based on full dryness, because the plant stores water and the roots need oxygen between wet cycles.
The simplest method is a finger test plus a full soak. Press a finger into the soil about 1 inch (2.5 cm). If it’s dry at that depth, water thoroughly until it drains out the bottom. If it still feels damp, wait.
These ranges usually work:
- Warm, sunny outdoor conditions: often every 3 to 7 days.
- Mild weather or partial shade: often every 7 to 14 days.
- Cool, low-light seasons or indoor winter: often every 2 to 4 weeks.
If your pot is small and sits in direct summer sun, check more often – not because the plant needs “extra water,” but because clay dries quickly. Dry cycles are what keep rot away.
When you water, change the technique, not just the timing. A light splash leaves the root area damp near the surface. A thorough soak saturates the whole root zone and then lets it dry down. Always let the pot drain completely, and don’t water again until the mix is dry.
Shriveled or slightly wrinkled leaves usually mean the plant is ready for a soak. Transparent, soft leaves at the base point to too-wet conditions, not “not enough water.”

Helpful pick
Back to the Roots Self-Watering Terracotta Olla Pot (Pack of 3), 700mL Provides 1 Week of Precision Watering
This self-watering terracotta pot provides controlled moisture, aligning with the finger test method and less frequent watering.
Best Soil Mix for Hens and Chicks in Clay Planters
The best soil mix for hens and chicks is gritty, fast-draining, and mineral enough to keep air spaces open. The most common mistake is using potting soil straight from the bag, because it’s designed to hold moisture – not dry quickly.
Build a succulent-friendly base with added mineral “bite.” A reliable approach is:
- Base: cactus/succulent potting mix (or potting mix labeled for succulents)
- Add-ins: pumice, perlite, or coarse horticultural grit
You want enough grit that the mix doesn’t feel spongy when dry. When wet, it should not turn into a mud-like clump. If it compacts into a damp, sticky mass in your hand, it will likely stay damp too long in a clay pot.
Avoid:
- Peat-heavy mixes (they stay wet)
- Compost-heavy blends (they slow drying)
- Fine sand that compacts into a “cement” layer
If you’re repotting an established clump, don’t shred healthy roots. Remove old, water-holding soil around the base, replace it with a gritty mix, and let the plant do the rest.
One placement detail matters: don’t bury the rosette crowns. Set the rosette at soil level or slightly above, and keep leaves from resting in damp soil. That simple setup reduces the chance that water collects in the crown and triggers rot.

Helpful pick
vensovo 6 Inch Terracotta & Clay Pots for Plant with Saucer – 4 Pack Medium Terra Cotta Planter with Drainage Hole, Flowerpot for Indoor Outdoor Plants, Crafts, Wedding Favor
These 6-inch terracotta pots provide ample drainage and air space for gritty, fast-draining hens and chicks soil.
Common Growth Problems in Clay Pots and Causes
Most hens and chicks problems in clay pots trace back to light, water timing, and drainage. Because the plants are small, issues show up fast.
Leggy, stretched growth points to not enough light. In low light, the rosettes reach and spacing widens. Move to brighter sun or increase exposure gradually so you don’t shock the plant.
Wrinkled leaves with no rot signs usually means dehydration. A full soak after the mix dries is the right fix. If you keep watering lightly, you train the roots to stay damp, which creates rot conditions.
Soft leaves or a mushy base signals root or crown rot, almost always caused by damp soil that didn’t dry in time. Clay helps, but it won’t rescue a peat-heavy mix or standing water. Remove affected rosettes, improve the soil and drainage, and tighten watering back to true dry cycles.
Browning at the edges can come from sun after a move, mineral buildup from salty water, or irregular watering that includes slight underwatering followed by inconsistent re-watering. If the damage is localized and the center stays firm, it often stabilizes once the plant’s conditions settle.
Use this troubleshooting checklist:
- Stretching: increase light.
- Wrinkling: water after full dryness.
- Mushy: remove rot and fix drainage + soil.
- Browning after a move: acclimate to brighter sun over 1 to 2 weeks.
How to Propagate Hens and Chicks From Clay Pots
Propagation is where hens and chicks really earn their reputation. Offsets multiply, and you can separate and replant them – with clay pots making the timing easier because the pot dries quickly in a gritty mix.
Propagate when growth is active and avoid severe heat waves. Daughter rosettes form around the mother, and you can separate them once they have their own roots or a stable base.
A common propagation path:
- Choose a healthy offset rosette with solid leaves.
- Remove it using a clean hand pull or small tool, minimizing damage to the daughter’s roots.
- Let the cut surface dry briefly (hours, not days under normal conditions).
- Plant into a gritty mix. Support lightly, then water only after the mix dries enough to prevent trapped moisture.
For offsets with no roots yet, dry timing matters even more. Place them in bright light but not full scorching sun at first, and avoid frequent watering. Keep enough moisture to prevent shriveling, but don’t keep the crown constantly wet. Let the mix dry between waterings.
If the mother starts to decline, don’t panic. Some hens and chicks naturally cycle out as offsets take over. Separate the daughters and focus on re-establishing the new rosettes, then compost or discard the failing center.
FAQ
What size clay pot should I use for hens and chicks?
Use a pot only slightly larger than the clump you’re planting, typically with 1 to 2 inches of space around the outside rosettes. Oversized pots hold extra soil moisture and increase rot risk. A wide, shallow clay pot with drainage holes usually beats a deep one.
How do I stop root rot in a clay planter?
Fix drainage first, then soil. Use a clay pot with drainage holes, never let runoff pool in a saucer, and plant in a gritty succulent mix with extra pumice or perlite. Water thoroughly only after the soil is fully dry, then drain completely before watering again.
How often should I water hens and chicks in summer?
Check dryness rather than following a calendar. In warm, sunny conditions, watering is often every 3 to 7 days in clay pots, but wind and heat can shorten that. Water only when the soil is dry about 1 inch deep, and always water until excess drains out.
Can I propagate hens and chicks without roots?
Yes, but keep the crown protected from constant moisture. Let the separated area dry briefly after cutting or pulling, then place it in a gritty mix. Keep it bright but avoid heavy watering until the mix dries between waterings.
What’s the most common mistake with hens and chicks clay pots?
Using potting soil that stays wet too long, or watering on a schedule. Clay dries faster than plastic, but it still can’t prevent rot if the mix is peat-heavy or if you repeatedly add water before the soil dries. Stick to dry cycles and gritty soil, and most problems disappear.

- 10 Best Slow Cooker For Slow Cooking Grains 2026 (Tested And Reviewed) - October 17, 2026
- 10 Best Slow Cooker For Slow Cooking Legumes 2026 (Tested And Reviewed) - October 17, 2026
- 10 Best Slow Cooker For Slow Cooking Oxtail 2026 (Tested And Reviewed) - October 16, 2026